Sunday, June 30, 2013

A simple grilling recipe for hot summer evenings!

Flank steak is traditionally a tough cut of meat, although it has become much more trendy in the past few years. It is a cheaper cut of meat, but has a wide variety of cooking options. Using strips of flank steak is great way to top a salad and when marinated can be quite tender and flavorful. For this recipe, I decided to utilize the warm summer evening here in Ohio and grilled it with some vegetables and made a nice light chimichurri sauce to dip everything in. Chimichurri sauce originated in Argentina, and is often used with grilled meats. It is a very light and refreshing sauce that could be used as a marinade and to top a variety of foods. Dipping grilled peppers and zucchini in chimichurri is very delicious as well. In culinary school, we served chimichurri with our empanadas.

Grilled Flank Steak

Serves: 3-4        Cook Time: 10 min              Prep Time: 20 min

  • 1 lb flank steak
  • Olive oil to coat
  • salt and pepper to taste

Directions

Allow steak time to reach room temperature. I let it sit out for about 20-30 minutes. Before you grill season with salt, pepper and olive oil to coat. Grill approximately 3-4 minutes per side depending on thickness for medium to medium rare.

Tip- Steak cooking 101

Chimichurri Sauce

  • 1/3 cup white wine vinegar
  • 1 small shallot, roughly chopped
  • 3 garlic cloves, peeled
  • 1 cup italian parsley, roughly chopped
  • 1 cup cilantro, roughly chopped
  • 1 teaspoon red pepper flakes
  • 1/2 lime juiced
  • 1/3 cup extra virgin olive oil
  • salt and pepper to taste

Directions

Place garlic, shallot, vinegar, and lime juice in blender. Add parsley and cilantro then blend. Add olive oil and blend. Season with salt and pepper.

Grilled Vegetables

  • 1 zucchini, cut in half
  • asparagus, trimmed
  • 1 bell pepper, cut into 4 flat sides
  • Olive oil to coat
  • salt and pepper to taste

Directions

Season with salt and pepper and coat with olive oil. Grill until tender and slightly charred.


Ready to plate and serve

Steak 101

Unless you are Steven Raichlen of Primal Grill©, or are a line cook at a steak house, you have probably felt a little intimidated when it comes time to cook steak. I used to be quite intimidated myself, there seemed to be so much guesswork involved. How are you supposed to know when its done? What temperature is safe? What is the correct way to cut it? When to do you cut it? There seemed to be more questions then answers. Attending culinary school and working at the local cooking school has given me insight and practice into how to properly prepare steak. And I will share what I have learned with you.

Cooking Steak

It is important to let your steak come to room temperature before you cook it. This allows the meat to cook evenly and give a better browning or sear. If it is not room temperature, some possible results may include: cold center, tough outer edge and no browning. Just take out the meat about 20 minutes before cooking it and longer if it is a larger cut.

Depending on how rare or well done you want your steak changes the cooking time. A recipe may tell you to cook a number of minutes per side, but the truth is that every piece of meat is different and each will have a different cooking time. So time is not a reliable indication of how well done your meat is. Temperature is the single most important factor used to determine how well done your steak will turn out. Table 1 below show the desired finish and the associated temperatures. The reason you cook it to the temperatures listed is that once you remove the meat from the heat source, its internal temperature will continue to rise an additional 5-10 degrees depending on the size of your cut. This is called carry over cooking. Carry over cooking happens because there is so much contained energy stored in the piece of meat. After it has been removed from the heat source, heat will continue to be released resulting in additional cooking. This happens with all types of meats and cuts. The bigger the cut, the more carry over cooking will occur.

Table 1: Finish Temperatures
Desired Finish Internal Temp Final Temp
Rare 115-120 °F 120-125 °F
Medium Rare 125-130 °F 130-135 °F
Medium 130-135 °F 135-140 °F
Medium Well 140-145 °F 145-150 °F
Well 150-155 °F 155-160 °F

Once removed from the heat, it is important to let your steak rest before cutting. This allows all the juices to redistribute throughout your steak. If you cut directly into to the steak without a rest period, all the juices will run out, leaving you with a dry, tasteless piece of meat. No one wants to ruin an expensive cut of meat, so wait at least 10 minutes. Again, if the cut is bigger you may want to wait 20-30 minutes. It is well worth it.

Another trick to help determine if your steak is cooked to the desired finish is to use a trick with your hand. Using the inside palm of your hand beneath the thumb, outlined in red below, the firmness at that point is roughly equivalent to your steak desired finish. As you touch your thumb to different fingers the firmness changes. The images below depict the hand position given a specific finish.

Position 1: Rare, 2: Medium Rare, 3: Medium, 4: Medium Well, 5: Well

Cutting Steak

Now that you know how to properly cook and rest your steak. The next important tip to remember is how to properly cut your steak. With any steak you want to cut slices against the grain. This creates a tender slice of meat. If you cut with the grain, it will be very chewy and possibly less enjoyable. By cutting against the grain, the meat remains much softer and will give easier when you chew it. Much like the grain in a piece of wood, pay attention to the direction of the meat fibers.

Depiction of grain (red) and cutting direction (green)

Food Safety

The final topic I will cover is how to safely handle raw meat. When handling any cut of raw meat it is important to avoid cross contamination. Cross contamination occurs when the raw meat juices or bacteria attach to other items that are not being cooked or cooked to a lesser temperature. This has the potential to cause health problems. So whatever touches a raw piece of meat, make sure to thoroughly wash, or switch to clean, utensils, cutting board, or plate before touching the cooked meat again. It is very important to be safe, no one wants to get sick from their food. You can never be to careful. Safety first!

Thursday, June 13, 2013

An italian classic remade. A fruity tiramisu!

I love Tiramisu! It is one of my all time favorite desserts. It is so light and airy with such amazing bold flavors. There are many interpretations on this favorite. This is not my classic version, but a more seasonal dish appropriate for summer. Berries are natures candies. I love fresh berries! I cannot get enough of them. I can eat an entire container of berries in one sitting. For this post, I decided to do a raspberry tiramisu. One of my favorite berries in one of my favorite desserts! I do not think there is anywhere to go wrong.

Raspberry Tiramisu

The star ingredients: Chambord, Framboise Lambic beer, and fresh raspberries.
The star ingredients

Serves: 10-12        Cook Time: 0 min              Prep Time: 30 min

  • 3  6 ounce containers fresh raspberries, reserve one
  • 2 Tablespoons Sugar
  • 2 Tablespoons Chambord
  • 1 Tablespoon Powdered Sugar
  • 3 Tablespoons Heavy Cream
  • 8 ounces Mascarpone
  • 3 Tablespoons Chambord
  • 3 Tablespoons Raspberry (Framboise) Lambic
  • 1 Cup Heavy Cream
  • 1 Tablespoon Powdered Sugar
  • 1/2 Teaspoon Vanilla Extract
  • 35 Lady Fingers
  • 1/2 Cup Raspberry (Framboise) Lambic
  • Dark Chocolate, grated for garnish


Directions

Folding the two mixture together.
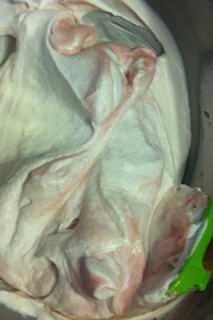
Folding cream into mascarpone mixture
Mix together the first measure of sugar, Chambord and 2 containers of raspberries. Lightly mash and set aside. In the bowl of a mixer fitted with a paddle attachment, combine the first measure of powdered sugar, heavy cream and mascarpone. Mix until light and fluffy. Then mix in the second measure of Chambord and add the first measure of Lambic. Set aside. In a another bowl add the second measure of heavy cream. Whip until it becomes slightly airy and fluffy. Next add the second measure of powdered sugar and vanilla extract. Continue to whip until stiff peaks are formed. Gently fold in 1/3 of the whipped cream into the mascarpone mixture. Then slowly fold in the rest of the whipped cream until fully incorporated. In order to assemble, soak ladyfingers in the remaining raspberry Lambic for about 5 seconds. Lineup the lady fingers in the bottom of a 2.2 qt pan until completely covered.  Some may need to be cut in half. Next take about 1/2 of the raspberry sauce mixture and layer over the lady fingers. Then take 1/2 of the mascarpone whipped cream mixture and spread evenly over the raspberry sauce layer. Repeat with remaining lady fingers, raspberry sauce and whipped cream mixtures. Let sit over night. When ready to serve, garnish with grated chocolate and fresh raspberries. Enjoy!

Assembly: Lady Fingers, Raspberry Sauce, Mascarpone. Repeat.

Plated perfection

Tip- Lambic is a belgian beer, spontaneously fermented and aged for a year or more (2-3) in wooden barrels. This produces a complex sour beer. Mixing lambics of different ages is called a Gueuze. Adding fruit to a lambic during the secondary stage of fermentation produces a fruit flavored beer. The typical fruits used are kriek/cherry, framboise/raspberry, cassis/blackcurrant, and probably another dozen less common fruits. If you have never tried a lambic, do yourself a favor and try one, even if you think you hate beer. Many non-beer drinkers enjoy the lambics which have fruit added. You are most likely to find the framboise varient at your local liquor store.

Wednesday, June 12, 2013

A new take on a old classic!

Who doesn't like Italian food? I have always had a love for Italian food, and it has only gotten stronger as I have developed my culinary skills. I love to make a classic bruschetta with tomato and basil. But for this dish, I decided to take a unique approach to this classic Italian appetizer. It is not yet tomato season here in Ohio; however, strawberries are in season. Nothing compares to locally grown, freshly picked strawberries. Fresh berries can add lots of color and look so stunning just on their own. It does not take much to make beautiful berries shine. This dish is so deliciously sweet, you might even consider serving it for dessert!

Strawberry Bruschetta

Serves: 8-10          Cook Time: 15 min              Prep Time: 10 min

  • 1 Quart Strawberries, sliced
  • 1/3 Cup Sugar
  • 1 1/2 Teaspoons Balsamic Vinegar, plus extra for drizzling
  • 2 Cups Ricotta, preferably homemade
  • 4 Tablespoons Heavy Cream
  • 3 Tablespoons Honey
  • 1 French Baguette, sliced 1/4" on bias
  • 1/3 Cup Extra Virgin Olive Oil
  • Salt and Pepper to taste
  • 1/4 Cup Fresh Basil, Chiffonaded

Directions

Mix the strawberries with the sugar and balsamic. Set aside. Place ricotta, heavy cream and honey in bowl of mixer. Using the paddle attachment, mix until all ingredients are combined. Set aside. Place baguette slices on a cookie sheet. Brush lightly with extra virgin olive oil and season with salt and pepper. Broil for 2-3 minutes or until golden brown around the edges. Let cool. To assemble: spread ricotta mix over baguette slices, add strawberry slices, drizzle with balsamic and garnish with fresh basil. Enjoy!

Tip-  The fewer the ingredients, the more important they become. When you are making something like bruschetta or grilled cheese it is really important to buy quality ingredients. This is because all of them will be in the spotlight. That is why in this recipe I used local strawberries, homemade ricotta and a high quality aged balsamic vinegar. This really allows the dish to reach its maximum potential. Your guests will definitely appreciate it.

Tip- Adjusting the sweetness of berries requires that you first taste the fruit before adding sugar. Some fruit is super sweet and may need little to none. The berries I used for this dish were slightly sour so I added additional sugar to balance it out. Each batch of berries is different, so while you may need to add sugar, there is a chance you will not. Which is why it is important to taste the fruit before you make this dish.
My favorite balsamic
The star ingredients
Strawberry topping
Ricotta spread

The final assembled product

Monday, June 10, 2013

My favorite green dip!

Guacamole my way! I never used to like guacamole, but when my boyfriend asked for some to put on his fajita, I decided to make it from scratch. Since then I have perfected this wonderful and healthy dip. It is a pretty classic version with a slight short cut. My family and friends all love this guacamole. I have even had people tell me they would buy it from me. But this post will share my secrets for free so that you too can enjoy this wonderful dip. I highly recommend trying guacamole with tacos, fajitas, or any mexican or tex-mex food of your liking. It's super simple to make and your friends will love it!

Guacamole

Serves: 4-6         Cook Time: 0 min              Prep Time: 10 min

  • 3 Hass Avocados, scooped
  • 1 Lime, juiced
  • 1/2 Teaspoon Granulated Garlic
  • 3/4 cup Garden Fresh, Jacks Special Salsa, Medium-Hot
  • 1Small Bunch Cilantro, chopped
  • Salt and Pepper to taste

Directions

Combine avocados, lime juice, garlic and salsa. Using a potato masher, mash all ingredients. You can leave it a little chunky or make it completely smooth. I personally like some avocado chunks in mine. Then mix in cilantro and salt and pepper. Enjoy!


Tip- Picking out a ripe avocado at the grocery store can be a challenge. There is always so much produce to choose from. How do you tell the perfectly ripe avocados from the not-so-ripe and overly-ripe? When looking for a ripe avocado, it should be a very dark green/black in color. It should still be firm to the touch, but give a little when you gently press on it with your thumb. It should not be easily dented or bruised. If you cannot find a ripe avocado, buy a hard one and place it on your kitchen counter for a couple of days and wait for it to ripen.

Monday, June 3, 2013

How to make an impressive and quick meal!

This is not really a spring/summer dish other than the fact that is pretty light. It was not something that was planned to be in the blog, but taste suggested otherwise. This dish came about because I did not want to go to the grocery store and just wanted to use up what was in the fridge. I have discovered that some of these meals can be quite tasty. This dish also has the colors of spring and summer with bright greens and reds. It is quick and easy to make and does not involve much prep work at all. The stuffing in this recipe would also work great on portabella mushrooms!

Mediterranean Stuffed Chicken Breasts

Serves: 2            Cook Time: 25 min              Prep Time: 20 min

  • 2 Boneless, Skinless Chicken Breasts (8 oz each)
  • 1/4 Pound Spanish Feta, crumbled
  • 1 Handful of Arugula, chopped
  • 1/2 Cup Sun dried Dried Tomatoes in oil, drained, roughly chopped
  • Salt and Pepper to taste
  • 1/3 Cup Flour
  • 2-3 Tablespoons Olive Oil

Directions

Preheat oven to 350 F. To make the stuffing combine feta, tomatoes, arugula and toss. Season with salt and pepper. In order to stuff the chicken, make a slit horizontally on the thickest side of the chicken. Make the slit about 2/3 of the way through the breasts horizontally. Then split the stuffing in half and stuff into each chicken breast. You may have to be a little forceful to make it all fit.


After the chicken is stuffed

Season the chicken with salt and pepper. Next dredge the chicken in flour and shake off the excess. Heat a large enough pan to fit both chicken breasts. Add oil and heat until it smokes. Add chicken on what would be skin side down. Now I know it will be hard but don't touch for 3-4 minutes in order to sear the breast. Then repeat on the bottom side.

TIP- Searing is a very important aspect of the culinary world. In order to sear, you want your pan and whatever fat you use to be VERY HOT! I know it is hard, but leave the item alone. The more it is touched, the less browning will occur. So leave it alone. Searing is important because it sears in the juices of the meat you are cooking. This will help keep it from becoming dry. Once seared, the meat can be braised, baked or roasted.


One more side to go

Once finished place on a parchment lined tray and bake 15-20 minutes or until the chicken reaches 165 F. Serve over dressed arugula.

Finished chicken served over arugula

Dressed Arugula


  • 4 Cups Arugula
  • 2 Tablespoons Extra Virgin Olive Oil
  • 1/2 Lemon, juiced
  • Season will salt and pepper

Toss arugula in lemon juice, olive oil and season.


Related Posts Plugin for WordPress, Blogger...